
Saturday, December 28, 2013
Cocoa Daisy Jan. Sneaks
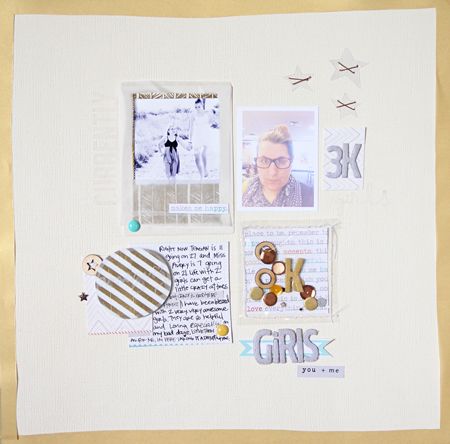
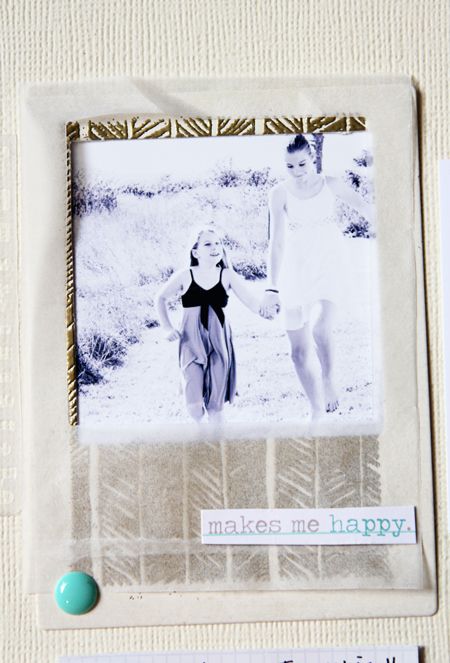
Hey all long time no see but that's a story for another blog post a week without power. Today I'm posting from my phone since Internet is still down in our area. Here is a little pile collage of my January project created with the Cocoa Daisy blueprint kit which will be revealed tonight so join us at 8pm est on the message boards.
Tuesday, December 10, 2013
Christmas Countdown
This was suppose to be posted a couple weeks ago but for some reason my blog decided not to :(
Tuesday Tutorial: Christmas Countdown
Hi, OA fans! Mandy Koeppen here with this weeks Tuesday Tutorial. Have your kids started counting down to Christmas? Maybe you have yourself? Today I'm going to share a fun and pretty quick Christmas Countdown decoration I made to put on out fireplace mantel.


Tuesday Tutorial: Christmas Countdown
Hi, OA fans! Mandy Koeppen here with this weeks Tuesday Tutorial. Have your kids started counting down to Christmas? Maybe you have yourself? Today I'm going to share a fun and pretty quick Christmas Countdown decoration I made to put on out fireplace mantel.
Let's get started.
Here is a look at the supplies I used to create my decoration as always you can switch out, adjust, substitute whatever you like. Dig in that stash if you're like me you probably have an older October Afternoon Christmas line in there if you haven't already picked up the new Silent Nightline. As you can see everything I used is from the Silent Night line.
Besides your favorite OA Christmas line you will need your favorite adhesive(tacky glue & glue gun come in handy)and a wood circle(found mine at Wal-Mart for less than a dollar) or frame(you could do something similar with a frame).
STEP 1:Adhere your background pattern paper to wood piece.
STEP 2: Cut excess paper off with scissors.
STEP 3: This step is optional. Sand edges of circle. I like to do this to make sure the edge is even.
STEP 4: This is where your tacky glue or glue gun come in handy. Adhere ribbon or lace across your circle.

STEP 5: Adhere mini clothespin to middle of lace/ribbon. 
STEP 6: Create title. I used this chipboard piece for my title then layered on several different pattern papers.
STEP 7: Adhere your title to the circle. I placed mine at the bottom but you can put yours wherever you like.
STEP 8: Embellish the circle. Leaving a space in the middle for your daily countdown number card.You could also do this step last but I decided not to wait. 

Step 9: Depending on how you choose to display your circle this is the step where I added ribbon to the back because I thought I would hang it but then decided to use a mini easel stand i had in my stash. You could hang it with ribbon, you could put a magnet on the back to hang it on the fridge, or you could get a mini stand like I did. 
STEP 10: Cut out one 12x12 sheet of the October Afternoon journal cards. Each sheet has 24 cards(12 on both sides) enough cards if you start your countdown on December 1st.
STEP 11: Cutout 1-24 using die cutting machine or use number stickers for each of the 24 days.
STEP 12: Adhere numbers to each side of the cards. You can also embellish the cards with washi and stickers if you like. Here are a few on side A
Clip on your number remember start with 24 and go backwards.You can Now we are done.
Thanks for joining me for today's tutorial! I hope I've inspired you to create your version of a Holiday Countdown. Have a great day~Mandy
Thursday, December 05, 2013
October Afternoon A Very Merry December Album: MK style
This year October Afternoon has put together a fabulous kit for you to document your December and your Holiday season. You can find info about OA's A Very Merry December kit HERE.


I knew I wanted to do something to document our December but I wasn't sure which direction I would take or what I would use so I pulled my own kit from my stash, I bought a kit, and then the OA design team was told about the A Very Merry December kit and I knew that was the way I was going the other 2 were nixed right then and there. I'm glad I made that choice, I really love the Daily Flash album and page protectors, I love the product included in the kit, and of course because it's OA I can pull other OA items from my stash and it coordinates perfectly. I can also add bits and pieces of my own too. Every week the Design Team is sharing pages from their album on the October Afternoon Blog. I am part of the Wednesday group along with Jill Sprott & Mou Saha(can you say OMG I crush on both of these 2 amazing ladies!). Yesterday we shared the first 3 pages and I wrote that I would give more detail on my blog so look for a post about the added extras I've added here on the blog on Thursday and probably Sunday's all throughout December.
I've changed things up a little bit so that my album will be different from years past(and will be completed by January 1st). This year I'm focusing on the everyday life along with the Holiday season because we don't do something Christmas related daily and my album will also include the days following Christmas.


I've changed things up a little bit so that my album will be different from years past(and will be completed by January 1st). This year I'm focusing on the everyday life along with the Holiday season because we don't do something Christmas related daily and my album will also include the days following Christmas.
This page I cut down a page protector from the kit. Added a Webster's Pages Reindeer.
The first day of December I was sick in bed most of the day so nothing really happened here. The 1 & Sick day stickers are from older October Afternoon lines: Rocket Age & Farmhouse. The right side is a Project life card from the Midnight collection, the tree is from an old American Crafts line, and the background paper is from Chronicle Books.
Day 2 our Elves arrived. On the left the 2 is from the October Afternoon Farmhouse line. On the right this is another page protector cut down. There is a note Santa sent in the box with Bernard and Eddie. The tag is from Jenni Bowlin. I stitched the tab to the page protector to help hold the tag inside it.
Day 3 starts on the back of that cut down page protector. Everything on this page is from the kit except for the October Afternoon Reindeer washi and Date card at the bottom it's from Pebbles. On the Right side the Photo Strip is another cut down page protector. I've added the October Afternoon grey washi.
Here is a look at the variety of page protectors to give you an idea of how I cut them down to use them.
I'm thinking maybe a video or tutorial would be good to add after i created the next few pages to share.
If you have any question about my album you can leave a comment here or email(this can be found under the button at the top).
Hav a great day! ~MK
Sunday, December 01, 2013
Cocoa Daisy December Revealed
Here are the layouts I created with the Cocoa Daisy December kit.


 Thanks for stopping by! Mandy


Tuesday, November 26, 2013
Cocoa Daisy Sneak Peeks: Home Again

A HOUSE IS MADE OF WALLS & BEAMS. A HOME IS MADE OF LOVE & DREAMS.
Because of the US Thanksgiving holiday, Reveal Night will be moved up two days! Mark your calendar now for NOVEMBER 26th and join us on the message boards for the Reveal Night festivities. Same times, different date. Chatting starts at 8 PM ET, kits and add ons go on sale at 9 PM ET.
Many have penned words on the subject of home, but perhaps the best words of all come from Oliver Wendall Holmes when he said, "Where we love is home - home that our feet may leave, but not our hearts."
December's kit and add ons are all about that feeling of love and home. Featuring many Cocoa Daisy exclusives again, including the new wood veneers, we think you'll find all you need to focus on what makes your house a home with our December kit, Home Again, on sale to subscribers November 26th at 9 PM ET. Sales to the public will be at our normal day and time of December 1st at midnight.

We think the December stamps are ones you'll reach for again and again. Perfect for organizing and categorizing, you'll want to get them all! And don't forget to try out our Cocoa Daisy ink pads, they are the perfect black. Or you can go for bright colors, we've got them too with our Prima chalk inks.

Wednesday, November 13, 2013
Wordless Wednesday: Oh Mav!
A partying Mav on Teagan's Birthday. Not sure what this face is about. Love this Dude!

Tuesday, November 12, 2013
Silent Night Sketch
Today's post is my sketch post from this past week's October Afternoon blog.
I love the bold yet simpleness of the poster. I created this simple sketch with a a few added embellishments to inspire you. I hope you like it.
Here is the layout I created:
The first thing that came to mind when i started creating was that the bold vertical block would be a great place for a photostrip. I haven't scrapped many of the photos from the 2012 holiday season so the brand new Silent Night collection and this sketch was just the kick i needed to get those photos on a page. I love the classic Chrsitmas colors with the added pop of gold and chalkboard in this new line. The black chalkboard like washi tape from Silent Night is AWESOME! I used it for the journaling on the left side of the layout.The title and gift box are cut with the Cameo.
~Have a great day! MK
Sunday, November 10, 2013
1 hour packaging layout
I thought I would share one of my challenges from the Cocoa Daisy Crop last weekend. This was a 1hour challenge meaning the ladies had 1 hour to create a layout using 3 different types of packaging and then 20minutes to photography and upload to the CD gallery. It was a lot of fun.
 I posted a teaser the week leading up to the crop to give the ladies some ideas of what not to throw away? Here are some of the items.
Glassine bags your kit embellishments come in Clear plastic from embellishments
Basic Grey or MME embellishment backing
stickers from your CD bags
the clear plastic baggies from embellishments etc.
whatever packaging you want to use go ahead and use it.
Here is what I started with:

Embossed the BG packaging for the background of my frame.

Stitched a shaker baggie out of an embelly baggie


Journaling on a Cocoa Diasy Stamp backing

Frame cut with my bigkick and Laina Lamb die but you could freehand it.
Stars cut from the Websters Pages packaging.

Glassine bags your kit embellishments come in Clear plastic from embellishments
Basic Grey or MME embellishment backing
stickers from your CD bags
the clear plastic baggies from embellishments etc.
whatever packaging you want to use go ahead and use it.
Here is what I started with:
a few examples of what I did with my packaging.
Embossed the BG packaging for the background of my frame.
Stitched a shaker baggie out of an embelly baggie
Journaling on a Cocoa Diasy Stamp backing
Frame cut with my bigkick and Laina Lamb die but you could freehand it.
Stars cut from the Websters Pages packaging.
The layout again:
I hope I've inspired you to create something with packaging. Thanks for stopping by! MK
Subscribe to:
Posts (Atom)
This One Time... HI
Hello Friends! I hope you're doing well. I've decided once again to give this whole blogging thing a go in hopes that I'll ...

-
 Hey, Howdy, Hello!! If you've been hopping along the American Crafts Blog Hop and you've come here from Lilith Eeckles blog then yo...
 -
 Another Hop you say??Yes why yes it is another Hop! That's 3 in a week. CRAZY! You still have time to enter The Stringery Hop below. Ont...